Showing posts with label techniques. Show all posts

Sunday, April 21, 2013

Productive!!

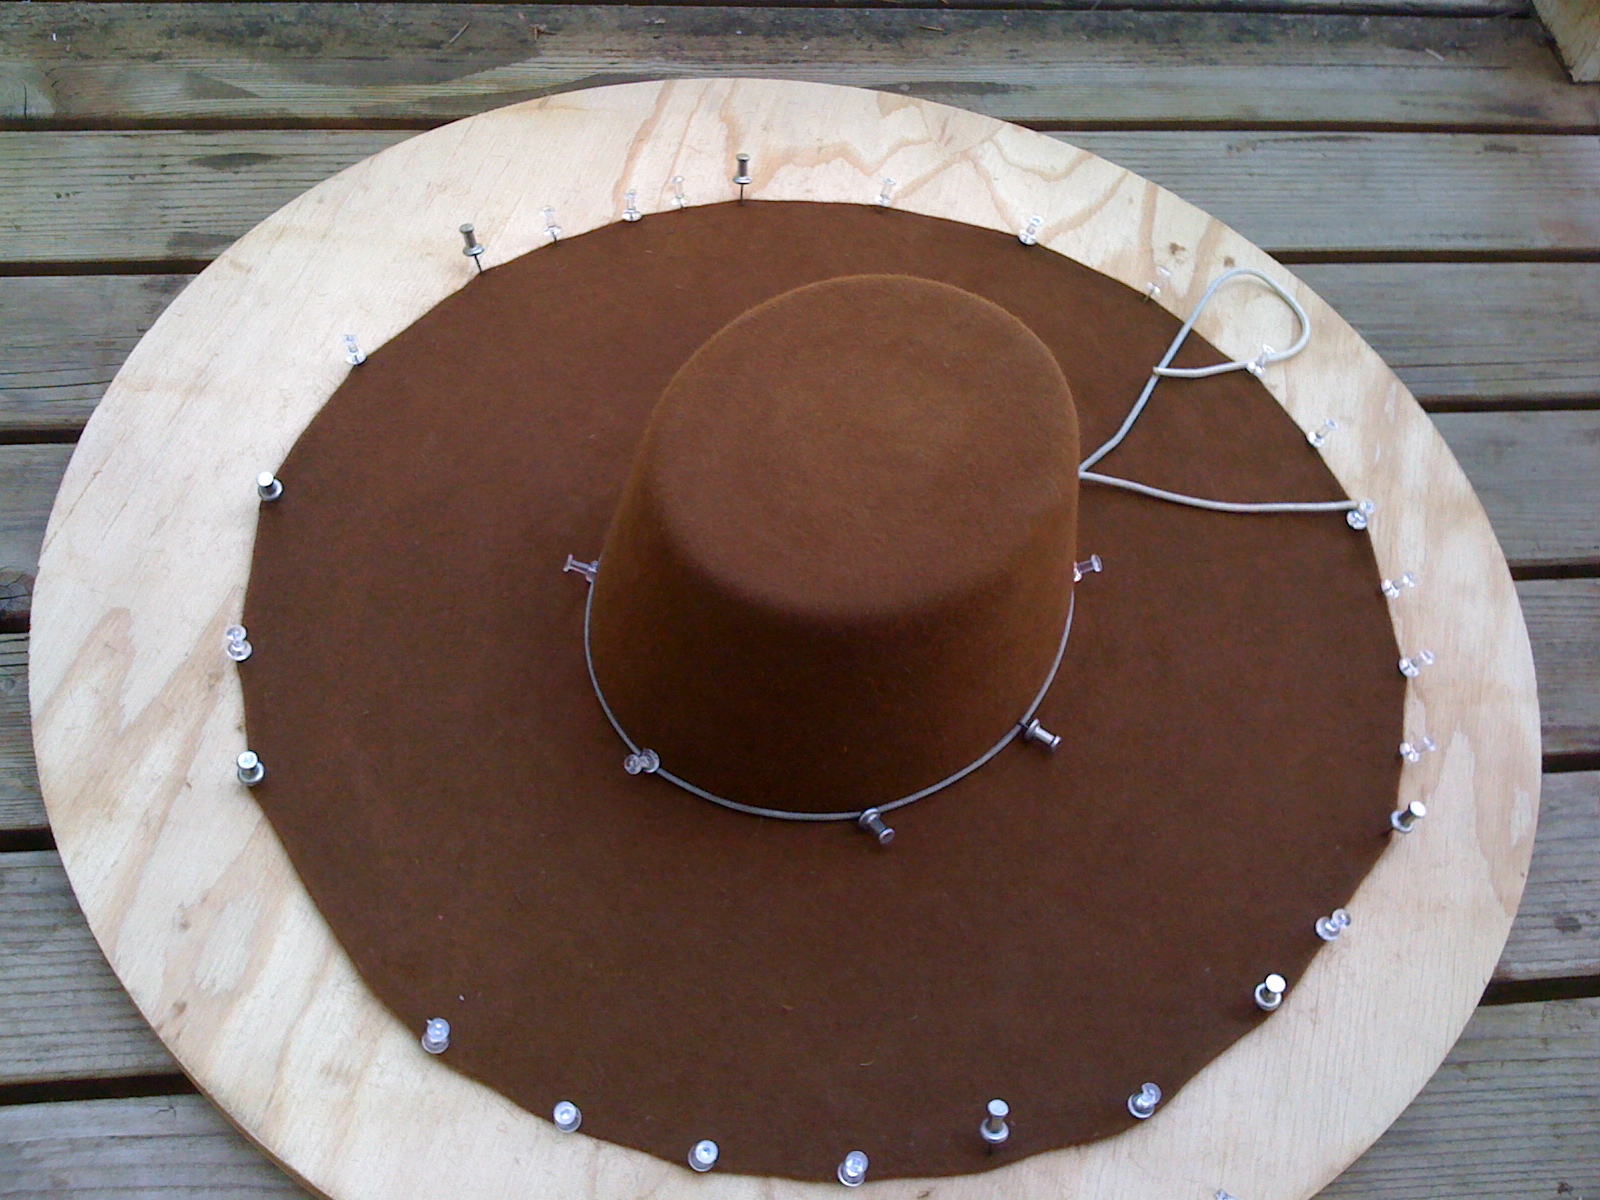
Many, many hats pulled this weekend. My hands look horrible, and are pretty actively sore... But I got a dozen hats pulled!! Six orders and six for the shelf. I'm going to have a fair number of shelf hats at this rate. I will need to get busy updating the store page.

I used the immersion method, rather than just steam, so they will need several days to dry, but that is definitely the most efficient way to pull a dozen hats.

I'm almost feeling caught up with orders!! I have a couple of flat caps to do still, and a few "whenever you get around to it" hats, and then I could really start filling my shelves!!
Now-if I only had an event or trunk show in mind for where to sell them, that would be great!! In the meantime, I'm just busy making them:)


Tuesday, February 5, 2013

Just HOW structured is that flatcap?

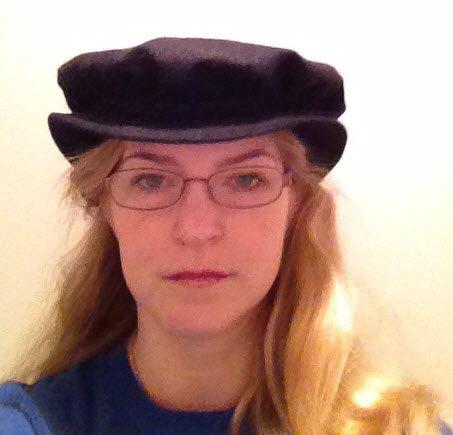
I had a customer tell me recently that she didn't like the way she looks in the really floppy flatcaps. I replied that the choice of interlining has a huge effect on the way the bag part sits, stands, or drapes. I took some super-classy cell phone photos to send her to show her the difference between a flatcap with a very soft interlining and one with a stiff, canvas interlining, and it occurred to me that some of you might be interested in them as well.
Please pretend I have, you know, makeup on, and my hair is, I dunno -brushed, and that I am not in a sweatshirt in my hallway. K?
Here we go:

The FLOPPY one. This is a medium weight fuzzy black wool, interlined with plain old broadcloth. It's very soft.


This is a smooth, lightweight navy blue wool, interlined with canvas and tafeta. It is quite stiff, and can be reshaped in a number of ways, and stays where it is put.


Both of them have plastic that is edged with wire inside the brims, with no seam on the brim edge, so that they are as thin as possible, to show off the curve I put in the wire.
They pack totally flat, are completely waterproof, and are *almost" indestructable. Three people I know have worn theirs almost completely out - but it took them about 11 years to do so.
Yeah - you know who you are Greg, Amber, and Dave.

Wednesday, December 12, 2012

Raising the hat bar. And Pushiness.

I recently managed to score a visit with a couple of incredibly knowledgeable and informative hat people: Richard  from Lamode hat blocks and his wife Roni, who had her own line of really lovely dressage hats (made on her husband's blocks).  I called and asked if I could invite myself over (pushy much?) and ask them questions about how I can improve my hats. After a couple of persistent calls and emails, I received the OK to come over. I brought a bunch of my blocks, and hats in various stages or completion, and asked Roni what she thought, and how I could improve.

She began with "They look great to me." Which was lovely and encouraging, but not what I was hoping for, since her work looks much more finished and professional than mine. I gently pressed for more specific information, and the advice started to flow.

She recommended that I not trim or wire the brim untill all the sizing was finished, and that I think of the pulling as an almost preliminary step - with the "real" pull being the one that comes after the sizing has dried, in order to get the most clean shapes. (Yay - this is more like it!)

I asked how she keeps the top of her top hats so flat, since mine eventually curve up a little, even if I've sized them to death. She said that she glues an oval of foamcore board into the tip before she lines the hat. They stay perfectly flat, and very sturdy that way.  (Um - YEAH. That's a pretty FABULOUS idea! Weighs nothing and won't warp with moisture - yep. DOING that from now on - I can cover one side of the oval with fabric before I glue it in for hats I'm not planning on lining.


Which brough us to linings. She gave me her lining source - which I never would have found online. She gave me an old order form of hers so that I could see what she ordered, with notes like "leave the cards in, please." (Cards? ok - that's news. I thought hat linings were just fabric -  but hers looked beautiful:
 so - cards it is.)
Trouble with her lining source, they will probably want a large order, so for starters, I ordered a dozen or so from HatsByLeko. Also ordered "reeded"leather sweatbands from Leko- since if I'm lining them, they really need a sweatband, which they actually needed anyway.  She gave me her sweatband source too -but those things are PRICEY - so I figured I'd try this out with a few and see what I think before I order a gross of them from somewhere with my logo on it :)


I asked how she got her long-haired top hats to shine like that:
And she said "Vaseline." I blinked - that's news too. And kinda scary news. But it looked awesome, so, I'll try it.

What else did she say....She talked some about the sewing in of the leather sweatband, and how that does require a special machine, which I have since found on eBay for $2,300 for just the machine head - no table or engine. :| She said she spent several years sewing them in by hand - sounds like an excellent plan!

As I was leaving (I sensed that it was time to go) she said "Well, I doubt I was much help to you -I  hope this was worth your trip." (My trip was 12 minutes long.)  I listed off the tips she'd given me and thanked her profusely - then got out of their day.

So - I have now applied several of her tips on a long haired beaver blank (that I bought from her husband this summer - so I know it's the same kind she used), and thought I'd share the results.

Vaseline: Hm....not loving it. Although definitely shiny, it looks and feels totally like a hat that has been....smeared with Vaseline.


Except for the tip - which looks perfect.


The Leko hat lining went in very smoothly. Pretty happy with that bit.

 The leather sweatband was another story, though. The product is fine - it arrives curved, and I expected it to go smootholy into the crowns of my rather cone-shaped hats. Apparently the pitch of my blocks is a little slanty-er than  the standard pitch, so I had real trouble getting the band the right size and shape to lie smoothly. Try number one looks pretty ok for a first try:


Though I do have a bump at the back that I simply could not get rid of.


But the custom order I want to put it into (lavendar hat with white feathers - you know who you are) was too slanted for it to go into even this smoothly, and I'm not putting it in there if it isn't gonna rawk. I tried to reshape the curve just with my iron, but that didn't work as well as I'd hoped. (like - not at all)

So - and I should totally grab a picture of this - I've got the band cut and stitched together at the back, and I'm stretching it to the right shape on the block I pulled the hat on. I wetted down the leather and have stretched and pinned the bottom of the leather band to the block. I will probably try rubbing alcohol rather than water for a quicker stretch and faster dry next time.

I'm 100% positive that this will work, but MAN it adds time. Lots of it. But they LOOK so NICE with hatbands and linings in them! Right? *sigh* The bar has been raised. Nothing for it but to figure out how to make it work in the most efficient and affordable way possible.


My initial thought is that I might offer two finish levels of my hats - the current unlined, un-sweatbanded ones (to keep them affordable)- and the Top Shelf" style - with bells, whistles, linings, leather bands and a sweet little bow at the back :)


Thoughts?


 By-the-way:

I highly reccommend doing the pushy-asking-for-help thing, for whatever it is you do, art or otherwise. Go find the experts and gently and persistently request their expertise.

 Wow - that was a big post.

Whew!

Now - what EVER am I going to do with this brown vaselined beaver hat?


Friday, July 1, 2011

two hats in their infancy


And here we see the birth of a lovely little forest green number, looking forward to meeting her owner in Oklahoma :) I used the new block on this and so for, so Great! (though the dowel on my spinner was too tight. Tim to get out the sandpaper and some elbow grease. I thought I would NEVER get that block back off the spinner. I also need to find my metal push pins....which are still packed.....somewhere...
 And the Lovely new fur felt Cavalier hat to go with a 1669 buffcoat. It goins ta be scrumdillyumptious. I'm going to get a full 5" out of this brim. Woot!
 And a couple of shots of the absolute disaster that is my workspace after preparing for the hat workshop.
 This HAS to improve immediately.

Hooray for sunny warm dry hatmaking days! I may be able to size both the new baby hats tonight - which is good, cause the Cavalier hat is due like immediately.

And that is all.

Wednesday, April 6, 2011

Hat shapes, parasisals, and a couple of custom requests

 In hat class last night, I made some more progress on felt hat #2:
Here it is on the block:


I got it off the block, basted a wire into the edge and and tried it on. Despite the fact that my classmates LOVED it on me, and the fact that I think it's coming out really beautifully, I believe I may have struck out for a second time in the "hats I personally want to wear on a daily basis" department.
 It's so funny - I can look at someone else and have a great guess on what will look best on them, but I'm apparently not so great at choosing the best shapes for MY face - at least not just by looking at a block I haven't used before.

The jury may be out till the hat is all done, cause I've got some fun plans for decoration on it, plus - it is shaping up to be a fall hat, and and my wardrobe is shaping up for spring. Spring! Where hats are straw and sinamay and parasisal:

Izzie had a sinamay hat she had just finished, which she let me try on. I don't have a picture but, ladies and gentlemen, THAT was *my* hat shape. Here is the block, covered with plastic and ready to start:

 I asked to start one of those, despite the fact that I'm actually supposed to be in the felt class. Izzie had a gorgeous cranberry red parisisal hood lying around that she let me purchase, which I had been eyeing since day 1.


Here it is just initially placed on the block:

and here it is with the string on and after some work:


We ran out of time for me to pull the brim, but I'm really excited about it - since I'm much more certain that it will look good on me, having tried the shape on already!

In other news, I had a request for a custom Greek sun hat like in these two images:  
He wants the point from the second image, but the brim from the first. I can do that.

Something about the images suggested to me that they might be made of straw, and with that in my head, I picked this awesome hat up to use as a blank. (for WAY less than it should have cost)
I look forward to showing it to Izzie and seeing what she thinks of the straw. It's lovely and fine-woven and pliable, and I think it will make a really nice quality hat.

Also had a request for this gorgeous hat:


Which also looks to me that it might be made of straw. (something about the lines that go around the crown).
Maybe I just have straw on the brain?

I don't own the right brim block for this one, and I don't know if Izzie does either. But - the requestor is a friend....so I'll look and see.

And that's entirely enough.


Monday, March 14, 2011

Some shots from last week's "Hat Class" with Izzie Lewis

My awesome little felt hat - using Izzie's cool hatblock collection!


We have a string in this groove - so that it dries with this indentation. Can't wait to SEE it!

 Izzie Lewis, showing a student how to block a straw hat (I think that's the straw) I've never done that...yet.

Me - working on getting the string deep enough into the groove.

Thursday, March 3, 2011

Where has THIS been all my life??

Well, OK, maybe not my whole life.  How bout - where has this been all the time that I've been making felt hats? This, my gentle readers, is my New Favorite Thing. It actually deserves a name, it is so awesome, but for now we will just call it "The Precious."

It is actually called a Rounding Jack and it is a custom made reproduction of a vintage hatmaker's brim cutting tool. Here is the etsy store link for the brilliant, BRILLIANT man who made it for me:

Up untill the arrival of The Precious, I had been using a bunch of cardboard templates of varying sizes to mark, and then hand cut the brims of my hats. These cardboard template have seen better days (years) as the felt is often still wet when I put the templates on them and cardboard templates no likey repeated exposure to dampness. That, combined with years of use has made the template edges not very consistent anymore, which really is the point of them. It was time to have them remade - and I thought to do them out of thin plywood with a handle on each one or something, but that was going to be pricey and a pain to store, and I could never find the one I wanted anyway, etc, etc, etc.

THEN

I found a video on one of the hat forums on which I lurk (or maybe it was ebay?) of one of these reproduction rounding jacks, and I could hardly sleep for the wanting of it. One tool - for meauring and cutting a perfect, smooth edge, adjustable to any brim width I could possibly need??? Run - do not walk!!
 Trouble is - they were pricey. Some of them REALLY pricey, and I've always got supplies that I need to order.  I hemmed and I hawed, and I looked at it daily with covetous lust. I sent the link to it to my husband with a note that said "Your wife really REALLY wants this."

Neither the birthday bear nor Santa delivered the goods. (they delivered other awesome goodies - just not THIS)

Then - I did well enough at the 12th night sales booth in January that I decided to bite the bullet and order the least expensive, no bells or whistles version of this tool - and just see if it could replace all my crummy cardboard templates.

Ordered it.
      Waited for it.
        Counted the days.
Then, this last Monday, The Precious arrived.

 A NEW tool - that uses easily purchaseable utility knife razor blades so that when it gets dull, I can put a new one in and keep working.
(blade can be raised and lowered!!)

It has a brass plate underneath the blade that goes under the brim of the hat - to protect my work surface from being cut by the blade.

I have one custom order hat and several spec hats on blocks right now, and I couldn't WAIT to try it out. I started with the Spec hats, just so I had some practice using it before I used it on the expensive custom cavalier hat. I needn't have worried - first time, it worked like an absolute DREAM:

 Second time great too - I lowered the blade a bit
Tried it on the third spec hat, and felt like I'd been using the thing for years. (sorry - no picture. It's an adorable little black perchy hat, soon to be making an appearance)

Finally - went to the Custom order.  I got kinda misty, it was so clean, easy, and awesome.


I'm absolutely in Love with my new toy tool. I would sleep with it like a teddy bear, but it DOES have a razor blade in it, so I've settled for just writing it this little blog post of eternal devotion. I may now need one of everything Mr DeCou makes.

I'll end with a gratuituous shot of my actually kinda clean workshop, which I hope get get back into over lunch today to wire and size all the newly trimmed (brimmed?) hats:

And that is all. I'm so thrilled!! No - I have to say it: Not thrilled, I'm Brimming over. :)

Friday, February 4, 2011

Sneak peek of the leedle buckram hat

Edited simply to correct my hideous spelling error in the original post.
(sheesh) (and they let me help my son with spelling homework)

My little buckram hat that I'm making in the Izzie lewis class is coming along swimmingly.

Here are some sneak peeks:


It's going to be absolutely adorable!! It's about the size of a salad plate and I am ALMOST overcome with "teh cuteness".

Almost - but not quite.

:)

Thursday, October 21, 2010

Cav hat progress and the blue beaver

SO - A productive hat morning!

I got to size five hats today, some of which are of particular interest. I've got one of the custom Cavalier hat orders pulled, sized, and wired, and it's working so well that I went ahead and ordered the rest of the blanks in the other requested colors. Though they were not the cheapest blanks out there, this particular company does several steps for me (blanks are indivudulaly made to order with the crown/brim break right where you ask for it to be, and you can specify a nice small starting headsize, which means no chance of having to shrink a head opening) AND seems to produce a thick, luxurious product. They are sturdy and lovely to work with, and I'll be proud of the end result. I call that a win! Here's the first custom order-in progress, in chocolate brown fur felt.


Here is a prototype of a similar in-progress hat, out of a rusty brown velour fur felt. It's coming together nicely, but these blanks can only be used on the larger headsize hats, or on this particular curvy topped block, which uses up the height of the crown that is naturally in the blanks. With these - one size is all they offer, and it's more like a 23 for starters.  It's coming together very nicely, and will look gorgeous all finished up. The color is sortof like russet velvet. 
 Now, in order to use these velour blanks,  I CAN cut the brim and the crown apart, pull and stiffen them separately, and reattach them. I've got two black cav hat prototypes that are going this way right now, and are working fine. Sadly, that technique adds about 50% more time and isn't as clean looking as all-in-one.

Also, I am finally using a one-of-a-kind blank I was given by a friend back in Ontario. It's a long-haired blank, very probably beaver fur. It's also screaming blue, and dyed the whole bathroom when I pulled it.

I have to say it has really exceeded my expectations. It looked like a hairy, nasty mass, till I got it stretched on the blocks, and then brushed in the direction of the fur. (Which I learned back in grad school to most professionally refer to as "with the kitty.") Now it looks all gleaming ad well-groomed and silky.
Still electric blue :)