Tuesday, November 15, 2011

New custom order finished!

Just finished a new custom order - check 'er out!
I LOVE the new bleached curly peacock swords!


This lady sent me swatches for her wardrobe of kirtles and jackets, all of which had been carefully crafted to be what I call "Elizeranimalized." (Elizabethan Garanimals? Get it?
Never heard of Garanimals? You're too young, forget it. Assume that I meant that her historical clothing wardrobe is beautifully and carefully coordinated.)
It's always a little tough to make a hat that goes perfectly with several changes of outfits, yet it is a common request. If I just stick all the colors in there, it gets kindof non-cohesive and sloppily designed, and
I'm not so thrilled with putting my label on that.
I feel like this one, however, will cover all bases, and came out looking quite nice all by herself!
Now I  just hope she loves it too :)


Saturday, October 15, 2011

great customer photo

Two friends from Texas, looking extra groovy in their Truly hats.
Thanks for sending!!

Monday, October 10, 2011

Straw Cavalier hat finished!!

It's finished! Looks pretty spiff, if I dare say so.
As always, click make bigger
I LOVE these cockades. I know I go on about them a lot, but come ON, aren't they amazing? I can make a fabulous, color coordinated focal point to go with ANYTHING now. I replaced the little pink organza flower in the center with a hand cast pewter stud with a Tudor rose on it. Something about those little plastic beads in the center of the flower were just not ok.

 Top view of the straw.

 And the ties that the customer requested to tie underneath her hair to keep the hat on in the wind. She wants to wear this in a sailing regatta at the end of October, and it needs to STAY ON. I tried them out - it really works well!
I sure do wish there were an easy-to-understand guide to shipping custom made straw hats to Australia.
I have to look up my exemption code every time. Everytime. Hm - maybe I could note it here for future reference.

NOEEI 30.37(a) value below $2500.00
Must hand deliver to the Post Office or schedule a pickup - don't just drop it in the box

Friday, October 7, 2011

Pink/silver cockade for the straw cavalier hat

Lookie Lookie.

(Click make big)

It's a lighter pink in person, with a silver grey cockade on top and an organza flower centerpiece, which I'm thinking I'm going to need to glue on for best effect. (drat-we hates glue!) It's not stitched down to the crinoline yet, but is sortof pinned out to show the design concept.

I need to go send her this by email too. Hope she loves it :)


Tuesday, September 27, 2011

Just ordered some new feathers!

Check em out - Bleached peacock swords!
I can't wait to see how these look. I love the natural colored peacock swords, and what I can do with them. My only issue is that the only come in one color - peacock color. These are pretty exciting, especially since I just also ordered an assortment of cream, tan, beige, rust, peach, bone, ivory, eggshell colored ostrich feathers. Amazing how fast I run out of things, and how exciting new supplies can be.

Monday, September 26, 2011

My favorite Willie photo

P1000524 by Trulinor
P1000524, a photo by Trulinor on Flickr.
My favorite shot.

Pockets!

P1000527 by Trulinor
P1000527, a photo by Trulinor on Flickr.
Willie's favorite part of the whole outfit - Pockets!

Back view

P1000514 by Trulinor
P1000514, a photo by Trulinor on Flickr.
Back of the Willie clothes

Willie's outfit

P1000506 by Trulinor
P1000506, a photo by Trulinor on Flickr.
Willie - looking pretty smart in his new suit. I really love how it came out. He gave me total creative freedom - AND stood perfectly still for both fittings. How much better can that be?

Such a clean workshop!

Better look now, cause I'm not sure that it will EVER be this clean again!
After the last big shop project (Willie's outfit and hat) I noticed that the dust bunnies were more like THAT bunny from THAT movie, and that even sweeping was just causing them to regroup and reorganize. To keep them from starting to lobby for voting rights, something had to be done.....so....with a stack of custom hat orders looming, I went ahead and did a deep clean anyway.


I'm not sure why I never take before pictures, but trust me - it's a pretty remarkable difference.
Tim brought up the industrial vacuum - the one with a five point harness - and we got every corner all clean.

Now - usually, when my chop is clean, you can't keep me out of there. It's like this siren calling to me, and I'm much more likely to feed my family spaghetti-os for dinner and be out there ALL NIGHT if even the cutting table is cleaned off.

Ironically, it's so clean....I don't wanna mess it up. I want to go sit in one of the chairs by the fireplace heater and drink tea.....but I"m oddly loathe to actually do anything that will mess it up again.

This is a new feeling, and I'm not sure how to deal with it. Probably starting a big new project will take care of it. Probably Kirsten's Viking stuff....

Anyway - here are some of the recent projects that made the shop need to be scrubbed:

 Willie's doublet, on Tim. (Above). I've got some great shots of Willie in this - will post those from Flickr later.
 Lovely Green hat for a nice lady in Oklahoma.
 Trying out a straw Cavalier hat for a lady in Australia...this one is sort of experimental....
 And (below) Cael's lovely hat, which ships out today. I Lurve it and can't wait for photos of it on him with his long red hair!

 And a pretty little red and black perchy number :) I want one of these for me.


Ok - that's lots. Back to it now.

Tuesday, September 20, 2011

Willie's new hat

P1000509 by Trulinor
P1000509, a photo by Trulinor on Flickr.
Great shot of one of the new blanks of awesomeness.

Monday, July 25, 2011

Some photos that SHOULD have gone with the previous post

Hello all!
Here are a couple of shots of the fascinator that I made in the Izzie Lewis class at Nancy's Sewing Basket here in Seattle.  I think it kinda got a little carried away - I'd brought all this stuff (feathers, netting, organdy, brooch, horsehair) to Maybe use on the fascinator, and I ended up, er....using all of it. It has a bit of a multiple personality disorder, but if we just assume that it's supposed to be "over the top", I'd say we hit that nail on the head. Here are the now standard "finished it on the ferry and took a cell phone picture" shots. I need to put my hair up and take a good photo with it on, though I'd look a leedle bit like a saloon girl. 
(click make big)
Whimsy-R-Us, anyone?

 See what I mean? The left side is all explosive-net-foo-with-a-funky-feather-thing-reminiscent-of- Dr Seuss (LOVE IT), and the right side is all rolled-organdy-elegant drape- lily leaves (Love it too!!) but the only thing they have in common is being black, and being on the same little comb base thingy. 

I clearly need to make more of them to "clarify my vision"  Then I need to figure out what to DO with them. I can only wear maybe one a year with the events that I attend, and I can donate one or two to the charity auction.

Though - I had NO idea how much veiling costs. NO idea. Wowza.

In unrelated news, here's a happy picture of Wayne Wichern (that SF milliner dude of awesomeness) in his shop. This, ladies and gentlemen, is what a lifetime collection of hat blocks looks like. Actually, this picture maybe shows 1/5th of his total collection. I was amazed. LOVED the nets hanging from the ceiling that held a bunch of stuff, too.

I got tons of ideas just spending an hour and a half with him. his work is SOOO clean, and his eye is artistic, and he was so delightfully real. Any of you who actually know me should know how important that is to me. I've got about ten seconds of patience for people who are not real.

If you ever get a chance - buy this guy's work. He's totally worth it.

Friday, July 15, 2011

So much hat stuff - so little time!

Aannd - so much hat stuff has happened in the last little while that I've NO idea where to start.

  • Met Wayne Wichern in San Fransisco (AWESOME!)
  • Went to the Dancing Hats event in Seattle where I met a whole bucket of wonderful local Seattle milliners
  • Attended another Nancy's Sewing Basket class, (taught by Izzie Lewis) where I made my first fascinator AND actually made some wonderful rolled edge organza flowers, of which there WILL be pictures but are not yet.
  • Have developed a totally new style of hat in my "line" which is a pretty standard eight piece newsboy cap. They are cute, adjustable, unisex, sewn hats and I'm having SO much fun with them! I've no idea yet where my marketplace will be. Thinking about farmer's markets and/or Etsy
  • Got reading/sewing glasses - cause apparently 41 is old enough to warrant those :(
  • And sent this custom order off in the nick of time:
He's lookin SO awesome!
I love it when customers provide me with photos of the hats in their natural habitat.

Friday, July 1, 2011

two hats in their infancy


And here we see the birth of a lovely little forest green number, looking forward to meeting her owner in Oklahoma :) I used the new block on this and so for, so Great! (though the dowel on my spinner was too tight. Tim to get out the sandpaper and some elbow grease. I thought I would NEVER get that block back off the spinner. I also need to find my metal push pins....which are still packed.....somewhere...
 And the Lovely new fur felt Cavalier hat to go with a 1669 buffcoat. It goins ta be scrumdillyumptious. I'm going to get a full 5" out of this brim. Woot!
 And a couple of shots of the absolute disaster that is my workspace after preparing for the hat workshop.
 This HAS to improve immediately.

Hooray for sunny warm dry hatmaking days! I may be able to size both the new baby hats tonight - which is good, cause the Cavalier hat is due like immediately.

And that is all.

Hat class in LA was awesome!


Though I do admit that I am glad to be home again, the class was a total win-win!
They even fed us beautiful homemade food for lunch and dinner!! I have pics of that somewhere...
yes...the class:
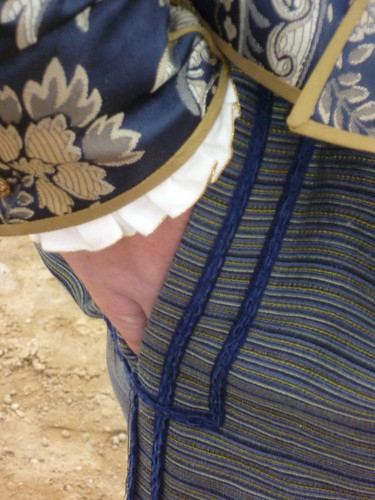
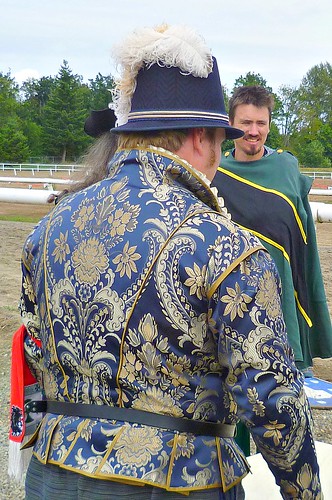
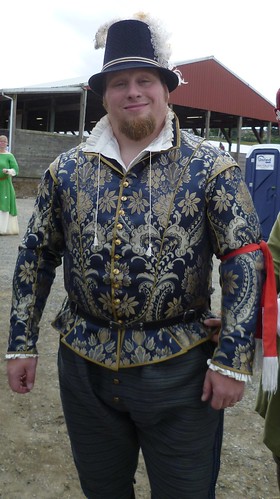
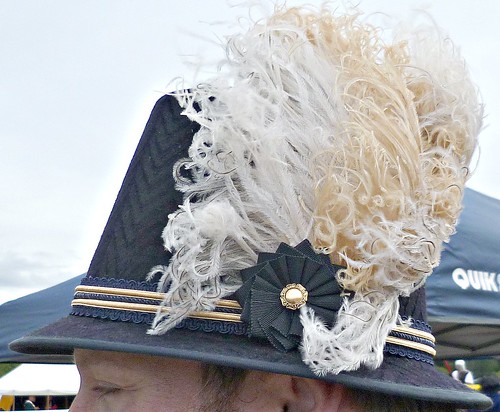
I taught three cockades that I learned from Candace Kling, gave a lecture with samples about millinery materials and sources, a hands-on section about feather work, (buying, curling, wiring, combining) and a demo of pulling a felt hat.
The only thing I forgot was my super-neat stack of crinoline squares, but my generous host, Giles, had some double buckram that I disassembled and made work. Not bad, all things considered.
It was very well attended: 15 students, two of them from the blog universe (Hi Austin and Coleen!) and the rest from the SCA. The group was a perfect size. Here they are, in the next two images:

 It seems that I only managed to take photos during the cockades classes, since the materials class was just me talking about a handout with samples and the pulling demo was, well, I had my hands full then. I could/should have taken photos of the featherwork section, but we were running behind and I was prepping for the pulling demo.
Here are some great shots of some of the students' cockade work:


In other news, I had a stack of custom orders kindof piling up for me at home, and I've wasted no time getting them started. After going to hat class at Izzie's (hooray! only a two month hiatus. Sheesh) I began two baby hats.

Hmm....blogthing won't let me add more piccies right now. Will post this and post more ab out the baby hats later. Also will post about the shop-of-chaos, which is going to get cleaned this long weekend.
After we go crabbing :)

Cheers all - and THANKS to everyone who came to the workshop and who made it possible. I know it was a lot of work, a lot of prep, a lot of cooking (thanks Joe and entire kitchen crew!!) but mostly a LOT of fun.


Tuesday, June 21, 2011

three new blocks!

And by NEW blocks, I mean "custom made by this awesome artisan in the shop at the Seattle Children's Theatre" kindof new. Newly come into the world - just for me -squeaky squawky new. Here they am:

Squee!

From left to right we have:
  • A very "I made this up myself" experimental kind of block, which can be sized down by taking off the 5/8" layers at the bottom. These are basically a series of tapered headsize plates. When I remove plates, the hat gets shorter but this style tends to scale down pretty well that way anyway. Each 5/8" layer adds about 1/2" to the circumference. Using the various configurations of this block, I can get various sizes from 21"(Gwenneth size) to 24.5"(Giles size). We'll see if the use of plywood for these plates is workable or not. This multi-block is on a base with two dowels that hold the entire apparatus together - like a spinner with two spindles. I need to sand down the dowels so that the layers can come off more easily, but it is totally working.
  • A 23.5", slightly-taller-than-my-current-ones cavalier hat block. This is Thore'-and-everybody-else-who-has-ordered-this-year sized. My largest flat topped block before was 23". (Ok, I've also got this freakishly large 26" block that I made and used one time only for a theatre who needed a hat for this 18th century dude in a periwig, but that hardly counts.) Murphy's law says, of course, that now only people with 22" heads will want cavalier hats. But I'm prepared for that too :)
  • A 23.5" tall hat block. Again, I had a 23ish one and a 24ish one, and this has a slightly different profile. (more like one of the extant ones.) Under this block is a spinner with a small enough spindle for the blocks I have. My collection of spinners is now less pathetic, though still not robust.
I can't wait to try these out!

But I haz to to wait. :( Cause I'm preparing to teach a full-day millinery workshop in LA this weekend!)
If ever there was a good reason to have to wait....that's sounds like one to me.

The to-do list is long, but shrinking every day.

Wish me luck :)


Friday, May 27, 2011

Two cockades - process shots

Here are some of my process shots of a couple of the cockades I made
 in the Candace Kling Cockades Class (hereafter known as the CKCC)

Here is a paper mockup:
 And here are the loops I cut out of 1.5" ribbon:
 The loops all sewn together in that very specific way...
 And the cockade laid out on crinoline and pinned out on the grid, all ready to stitch in place.
 The crinoline trimmed down, the loops pinned with teensy clips, stitching with strong thread. You can see what it is going to look like here, just needs the crinoline to be trimmed back and a button stitched over the center.
 A different cockade, I made 22 (I think) of these motifs. Made them in the green paper first - just to figure out what I was doing.
 All pinned to the grid. I didn't get this stitched till many days later, but isn't it AWESOME!
And....that's all she wrote today.